Your bedroom is your sanctuary, a place to unwind, dream, and recharge. But let’s be honest—staring at plain walls can get old fast. That’s where wall stencils come in, offering an affordable, creative way to add personality to your space. After stenciling a geometric pattern in my own bedroom and watching it go from “meh” to “wow,” I’m hooked. This 2,500-word guide explores 10 modern bedroom wall stencil design ideas, packed with tips, tools, and inspiration to help you create a space that feels uniquely yours.
Why Choose Wall Stencils for Your Bedroom?
Wall stencils are a budget-friendly alternative to wallpaper or custom murals, letting you add intricate designs without breaking the bank. They’re versatile, easy to apply, and perfect for DIY enthusiasts who want a professional look. Plus, they’re removable, making them ideal for renters or anyone who loves switching things up.
Benefits of Stenciling Over Wallpaper
Unlike wallpaper, stencils don’t require permanent commitment or expensive installation. They’re forgiving—if you mess up, just paint over it. My first stencil attempt had a few smudges, but a quick touch-up made it flawless.
How Stencils Enhance Bedroom Ambiance
Stencils can set the mood, whether you want a calming retreat or a bold statement. A soft floral pattern can soothe, while a geometric design adds energy. The right stencil can make your bedroom feel like a boutique hotel.
10 Modern Bedroom Wall Stencil Design Ideas
Ready to transform your bedroom? Here are 10 trendy stencil designs, each with a unique vibe to suit different tastes and styles.
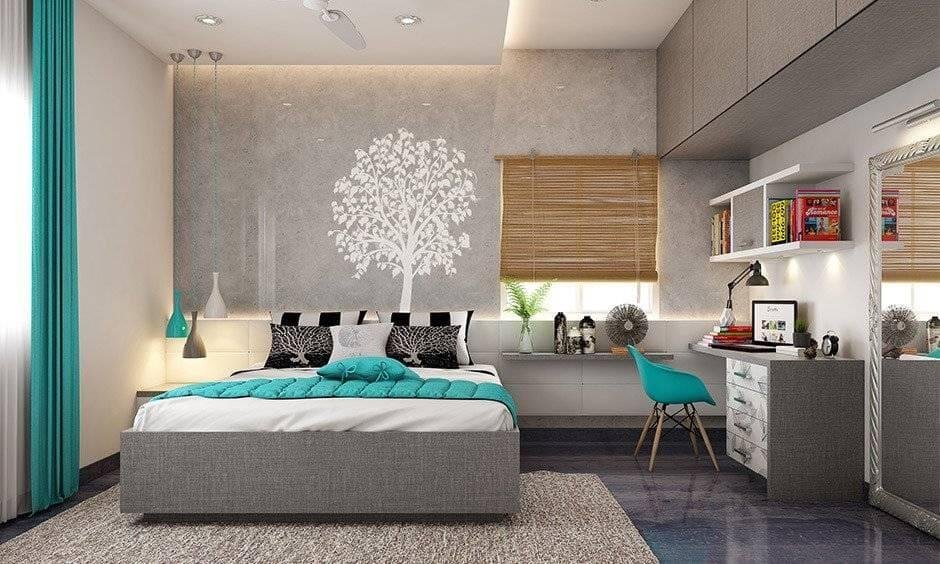
1. Geometric Patterns for a Contemporary Edge
Geometric stencils, like hexagons or chevrons, bring a modern, structured look to your bedroom. They’re perfect for accent walls behind the bed. Pair with neutral tones like grey or navy for a sleek, sophisticated vibe.
2. Botanical Motifs for a Natural Retreat
Floral or leafy stencils evoke nature, creating a calming atmosphere. Think oversized ferns or delicate vines in soft greens or creams. I used a fern stencil in my guest room, and visitors always comment on its serene feel.
3. Moroccan Tiles for Exotic Flair
Moroccan-inspired tile stencils add a global, bohemian touch. Use vibrant blues or terracottas for a bold look or whites for subtlety. These work great in small doses, like around a headboard or window.
4. Abstract Art for Creative Souls
Abstract stencils with fluid shapes or splashes of color let you channel your inner artist. They’re ideal for eclectic bedrooms. Pair with bold bedding to make the wall pop without overwhelming the space.
5. Minimalist Lines for Subtle Elegance
Simple line patterns, like horizontal stripes or grids, offer understated sophistication. Use soft greys or pastels for a minimalist aesthetic. This design suits smallrelated: small bedrooms where clean lines keep things airy.
6. Mandala Patterns for Boho Chic
Mandala stencils bring intricate, circular designs that add a spiritual, bohemian vibe. Use earthy tones like ochre or sage green for warmth. These are perfect for creating a cozy, inviting bedroom retreat.
7. Polka Dots for Playful Charm
Polka dot stencils add a fun, whimsical touch, ideal for kids’ or guest bedrooms. Opt for small dots in soft colors for a subtle effect. They’re easy to apply and instantly lift the room’s energy.
8. Herringbone for Timeless Texture
Herringbone stencils create a zigzag pattern that feels both classic and modern. Use muted blues or greys for a calming effect. This design adds texture without overpowering the room.
9. Vintage Damask for Classic Luxury
Damask stencils offer ornate, elegant patterns that scream luxury. Choose golds or silvers for a glamorous touch. They’re perfect for a master bedroom accent wall to add a regal feel.
10. Ombre Fade for a Soft Gradient
Ombre stencils blend colors from dark to light, creating a dreamy, modern effect. Try blue fading to white for a serene vibe. This design adds depth while keeping the room light and airy.
Comparison: Stencils vs. Other Wall Decor Options
| Aspect | Wall Stencils | Wallpaper | Painted Murals |
|---|---|---|---|
| Cost | $10–$50 (stencils + paint) | $50–$200 per roll | $100–$500+ (professional or DIY) |
| Ease of Application | DIY-friendly, moderate skill needed | Requires precision, can be tricky | High skill, often needs a professional |
| Customizability | Highly customizable with paint colors | Limited to pre-made designs | Fully custom but labor-intensive |
| Durability | Durable with proper sealing | Durable but hard to remove | Durable but permanent |
| Removal | Paint over or remove with sanding | Difficult, may damage walls | Paint over, time-consuming |
Why It Matters: Stencils strike a balance between affordability, ease, and flexibility, making them ideal for DIYers who want a custom look without the permanence of wallpaper or murals.
Pros and Cons of Bedroom Wall Stencils
Pros
- Affordable: Low-cost way to add high-impact design.
- Customizable: Endless color and pattern options.
- DIY-Friendly: Easy for beginners with the right tools.
- Removable: Paint over for a fresh look anytime.
Cons
- Time-Intensive: Stenciling requires patience and precision.
- Skill Needed: Can be tricky for intricate designs.
- Surface Prep: Walls must be smooth and clean for best results.
- Limited Scope: Best for accent walls, not full rooms.
How to Apply Wall Stencils Like a Pro
Stenciling is straightforward but requires care for a polished finish. Here’s a step-by-step guide based on my own trial-and-error journey.
Step 1: Choose Your Stencil and Colors
Pick a stencil that matches your bedroom’s vibe and select paint colors that complement your decor. Test colors on a small area first. I learned this after a too-bright yellow nearly ruined my vision!
Step 2: Prep Your Wall
Clean the wall thoroughly and apply a base coat of paint if needed. Sand lightly for a smooth surface. A clean wall ensures crisp stencil lines.
Step 3: Secure the Stencil
Use painter’s tape or spray adhesive to hold the stencil in place. Ensure it’s level—use a laser level for precision. Crooked stencils are a headache to fix.
Step 4: Apply Paint
Use a stencil brush or sponge to dab paint lightly over the stencil. Less is more—too much paint causes bleeding. Work in thin layers for a clean edge.
Step 5: Remove and Repeat
Carefully peel off the stencil while the paint is wet. Reposition for the next section, aligning carefully. Patience here prevents smudges and misalignment.
Step 6: Seal and Touch Up
Once dry, seal with a clear coat for durability. Touch up any imperfections with a small brush. A sealant keeps your design looking fresh for years.
Tools You’ll Need for Stenciling
Here’s what you’ll need to achieve professional results:
- Wall Stencil: Choose from brands like Cutting Edge Stencils.
- Stencil Brush or Sponge: For precise paint application.
- Painter’s Tape: To secure stencils without damaging walls.
- Laser Level: For perfectly aligned patterns.
- High-Quality Paint: Try Benjamin Moore for vibrant, durable colors.
Where to Get Wall Stencils
You can find stencils at various retailers, both online and in-store:
- Etsy: Unique, handmade stencils for custom designs (shop here).
- Amazon: Affordable options with fast shipping (browse stencils).
- Home Depot: Wide selection of stencils and paints (check it out).
- Local Craft Stores: Stores like Michaels or Hobby Lobby stock stencils and supplies.
People Also Ask (PAA)
Here are real Google PAA questions with concise answers:
Are wall stencils easy to use?
Yes, with proper prep and tools, stencils are beginner-friendly. Practice on a board first to get the hang of it.
How do you stencil a wall without bleeding?
Use minimal paint, a stencil brush, and secure the stencil tightly with tape or adhesive. Dab, don’t brush, to prevent seepage.
What kind of paint is best for wall stencils?
Acrylic or latex paint works best for crisp lines and durability. Choose a satin or eggshell finish for easy cleaning.
Can you reuse wall stencils?
Yes, most stencils are reusable if cleaned carefully after each use. Store flat to prevent bending.
Tips for Stencil Success
- Start Small: Begin with a small accent wall to build confidence.
- Practice First: Test your stencil on cardboard to perfect your technique.
- Use Low-Tack Tape: Prevents wall damage when repositioning stencils.
- Layer Colors: For ombre or multi-tone effects, blend colors gradually.
- Clean Immediately: Wash stencils with warm water to maintain quality.
FAQ: Common Questions About Bedroom Wall Stencils
How long does it take to stencil a bedroom wall?
A single accent wall takes 2–4 hours, depending on the design’s complexity. Intricate patterns like damask may take longer.
Can you stencil over textured walls?
Yes, but smooth walls yield crisper results. Lightly sand textured walls or use a thicker stencil for better coverage.
Are stencils renter-friendly?
Absolutely! Stencils are removable with a fresh coat of paint, making them ideal for temporary spaces.
What’s the best stencil size for a bedroom?
Medium to large stencils (12–24 inches) work well for accent walls. Smaller stencils suit borders or small spaces.
Can I create my own stencil design?
Yes, use stencil sheets and a craft knife to cut custom designs. Online tools like Canva can help with patterns.
Troubleshooting Common Stencil Mistakes
- Paint Bleeding: Use less paint and secure the stencil tightly.
- Misaligned Patterns: Double-check with a level before painting.
- Faint Design: Apply multiple thin layers for bold coverage.
- Wall Damage: Use low-tack tape and avoid over-scrubbing when cleaning.
Why Bedroom Wall Stencils Are Worth It
Stenciling your bedroom walls is like giving your space a personality upgrade without the hefty price tag. My geometric accent wall transformed my bland bedroom into a modern haven, and the compliments haven’t stopped. Whether you’re a DIY newbie or a seasoned pro, stencils offer endless possibilities to express your style. So grab a stencil, pick your favorite colors, and turn your bedroom into a masterpiece!
For more inspiration, check out HGTV’s DIY decor ideas or explore Pinterest for stencil patterns. Your dream bedroom is just a paintbrush away!